Monday, February 7, 2011

Treasures from Larousse Gastronomique - Storing Celery

My younger sister gave me a huge gift, the Larousse Gastronomique . It is THE encyclopaedia on all things food, cooking and anything related to it. If I come across some particularly interesting tips / info / useless information I'll post it here :)
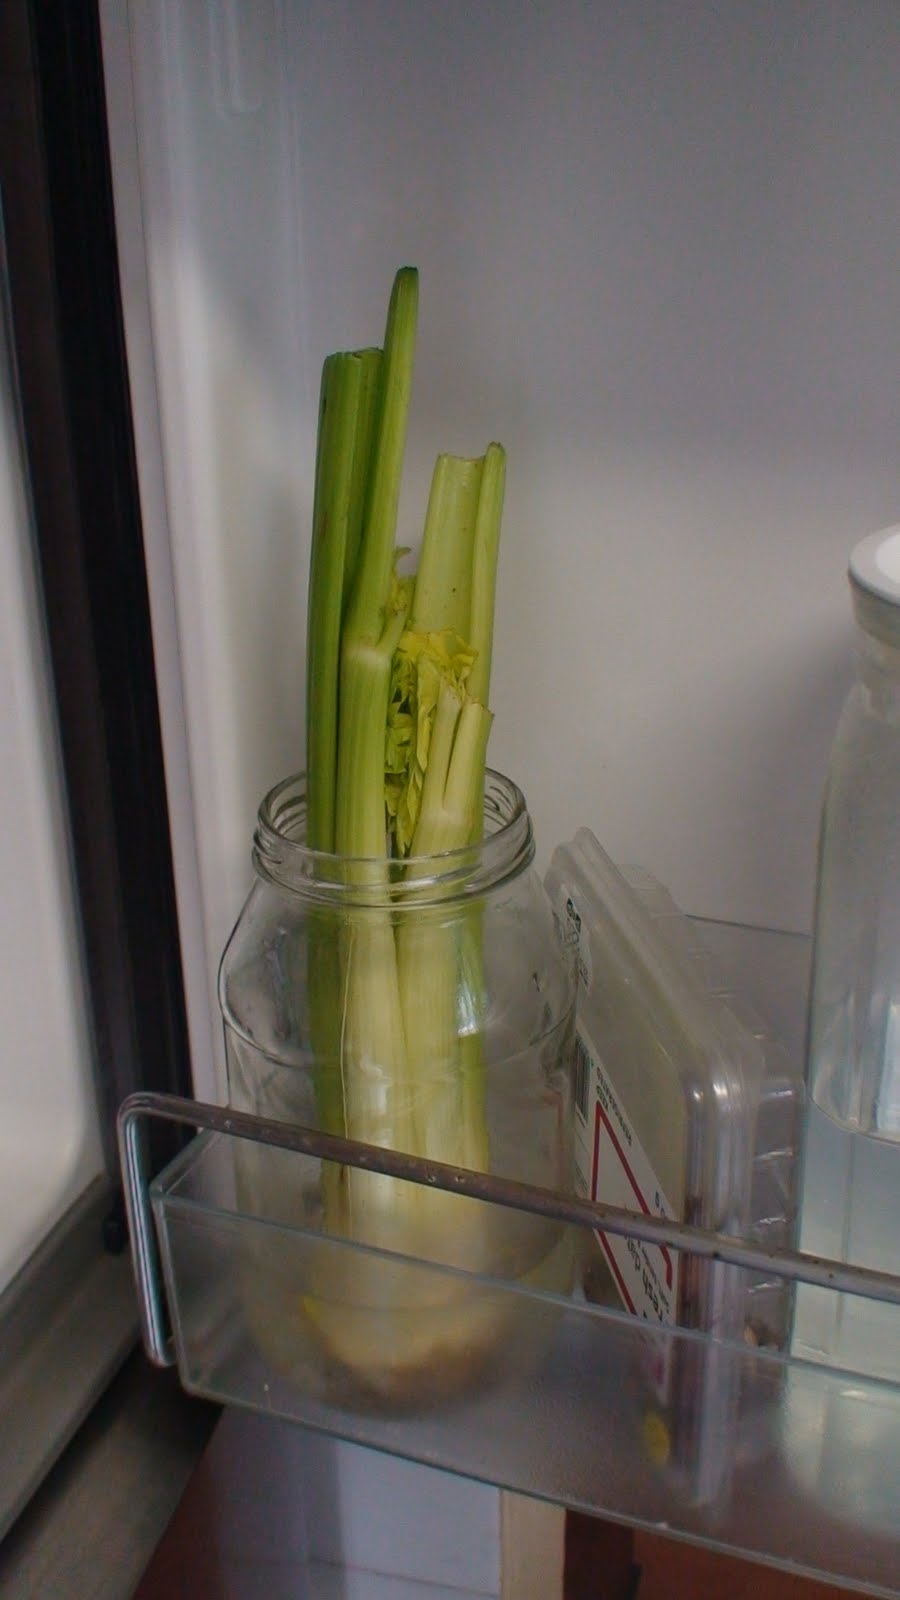
For e.g.: The best way to store Celery is in the fridge in a bottle with water to which a little salt is added. This keeps it from wilting quickly. (I did remove the leaves since they would wilt first, but remember that they are great in soups.)


Isabel's 4th birthday (and my 2nd 'made it myself birthday-cake)


Since last year Isabel has asked me for a heart cake that she saw in the same book from which I made Gabriel's train cake. It's basically one normal round cake and one square cake of the same dimensions. The round cake is then cut in half which forms the two rounds of the heart which nesstles agains two sides of the square cake.

The only square dish / pan I had was a glas dish but it was way too shallow, so I made a "collar" from baking paper to heighten the sides. Worked like a charm.

It was a great success and tasted great (thanks to the Woollies box cake which works out perfectly)


Monday, November 29, 2010

Decorating a cake


For baby boy's 1st birthday I thought it brave and wise to make his cake all by myself. In the past I have ordered cake from professionals usually with a picture on top that I had, at least, put together myself.

I have a problem with my oven, where everything that gets baked, comes out with a dome on top. And quite flat on the sides. I baked 4 x cakes using medium sized loaf tins. I used 2 x box cake for this. The "dome tops" all were cut off to make it flat for decorating. The 'cockpit' of the engine was two x thirds of one of the cakes put on top of each other.
Some tips:
* Apparently chocolate cake lasts longer than vanilla so I used that.
* Do not bake the cake and try to assemble on the same day. You will have to do a lot more plastering from broken cake parts (too soft). So: Bake on Thursday. Assemble on Friday (evening). Eat on Saturday.
* Try to avoid wanting to ice anything red. Unless you get the stuff that professionals use. I used the normal 'Red' food colouring and it stayed pink. This didn't quite call out "boy" in my mind. So I kept adding and adding and eventually I got it to a dark, dark pink but by then there was so much colouring in the butter icing it wouldn't mix in but was sort of seperating. I had also by then emptied the 3/4 bottle I had. Needless to say I thought "what the heck" and started to put it on as is. I had at least tested the taste and it was fine.
* To avoid getting cake crumbs in your butter icing when you spread it over, put bucket-loads on top first. Then start to spread it out. And you can not use too much either. Not as if someone's going to complain of too much butter icing. At least not in our family.
Well, the family enjoyed it. That's what counts. Baby boy would hopefully look at the photos one day and think, "Boy, that was a cool cake".
Wednesday, October 13, 2010

Making the gravy

Once your meat is done to crumbling goodness, it's time to get the gravy done.

Using some tongs, take out the pieces of meat and then pour the rest of the liquid with the cooked bits of vegetables and herbs into a sieve, letting the liquid run into a stainless steel pot (not aluminium, ever). The meat can be placed on a platter, covered with foil, into a slightly warm oven. Using a wooden spoon, mash the vegetables into the sieve to get as much of the liquid out as possible. (This makes a delicious addition to our dog's dinner.)

Now return the pot with the gravy liquid to the stove. Let it boil rapidly for about 5 minutes then remove from heat. Let it cool down slightly and then, using a deep spoon, skim off most of the fat you can.

Return the pot to the heat and let it gently simmer. For about 1/2 litre (which is what you'll get with 400ml vermouth and 400ml stock plus some boiling water), mix 2 tablespoons of corn flour (Maizena) and a little vermouth just enough to dissolve it. Add this gradually to the gravy while whisking. Let it simmer gently for about 5 minutes. Taste for salt. If it seems a bit "tarty" add 1/2 tablespoon sugar and re-taste.

Pour through a clean sieve again into a gravy boat OR over the meat.

Have some nice fresh bread handy to mop up the gravy juices :)

The basic french cooking method for braised meat

This basic method is used for braising meat (lamb/beef/pork) and makes delicious stews (where the meat is cut into blocks) or whole meat cuts.

I used very thickly cut pieces of lamb chops from the friendly Pick n Pay butcher.
First the meat is browned well on all sides in a pan covered in a film of normal vegetable oil. Be careful that the oil does not burn so you may want to turn down the heat a bit if it gets smoky. Do not use olive oil since it has too strong a flavour. Do this in batches and as they are finished put them into a big enough oven casserole dish (with lid).


Next you add one chopped onion, one sliced carrot (I used 2 since they were a bit skinny) and 2 sliced stalks for celery (1 was too skinny again) to the same oil in the pan. Fry these lightly over medium heat until the onion soften. Be very careful not to burn / toast the onion.

Strew the vegetables over the meat pieces in the casserole dish. Since I made a big dish for 5 people I used 12 lamb cuts and this barely fit into a very large roasting tin. For this amount I used 400ml extra dry vermouth (that's Cinzano for those who have to discover this like I had to :) ) with 400ml beef stock (one beef stock block dissolved in boiling water) in which you stirred 1 tablespoon crushed garlic. Pour this over the meat pieces. If the pieces are sticking out too much, add a little more boiling water. They can stick out by about 5mm.
Into the liquid push 5-6 twigs of thyme and 4-5 twigs of parsley. (Remember this is for quite a large dish.)
Before you put the lid on, take a piece of foil big enough to cover the top and put that over first. Then put the lid on. It provides a nice seal so you don't lose any liquid through evaporation.
Put this into a pre-heated oven of about 160C and cook for about 3 hours. (Or more if you like your meat to fall apart). Check about every hour just to make sure everything is still nice a bubbly.
NEXT: How to finish off your dish with a nice gravy

Wednesday, October 6, 2010

Scrambled eggs with a tropical twist

I made a lentil curry the other day and it gets coconut cream in it right at the end. The first time I made it, I added the whole tin and it was way too much and we ended with a lentil-curry-soup. So now I just add a couple of tablespoons to give it the nice flavour and colouring. But there's not much I can do with left-over coconut cream so yesterday, in a flash of inspiration, I added about 2 heaped tablespoons (if the cream has thickened) to my scrambled eggs (4) as I was scrambling them. It was delicious!

4 eggs, lightly beaten
2 tablespoons thickened coconut cream

Add to heated non-stick pan and scramble as usual.

Bon Appetit!

Tuesday, October 5, 2010

The Ribbon

In some cake and dessert recipes you have to seperate the yolks and egg whites from each other. The whites are usually beaten stiff and added at the end to lighten your batter (see tips in http://redcuisine.blogspot.com/2010/09/egg-white-disaster.html). For fresh handmade custards and custard-type desserts such as Crème Brûlée, you only use the yolks. Here is a very nice, easy recipe: http://www.cremebrulee.com/creme.htm

In Mastering the Art of French Cooking and in Julia Child's cooking show (available on DVD on Kalahari.net / Amazon.com / etc) she shows how yolks and sugar are beaten to form "a ribbon". This takes a little time and you know you're getting to the end when the yolks and sugar are beaten to a pale yellow colour. And when you lift the beater you'll see the mixture make a beautiful ribbon that falls gentle into the rest of it. Magnifique.